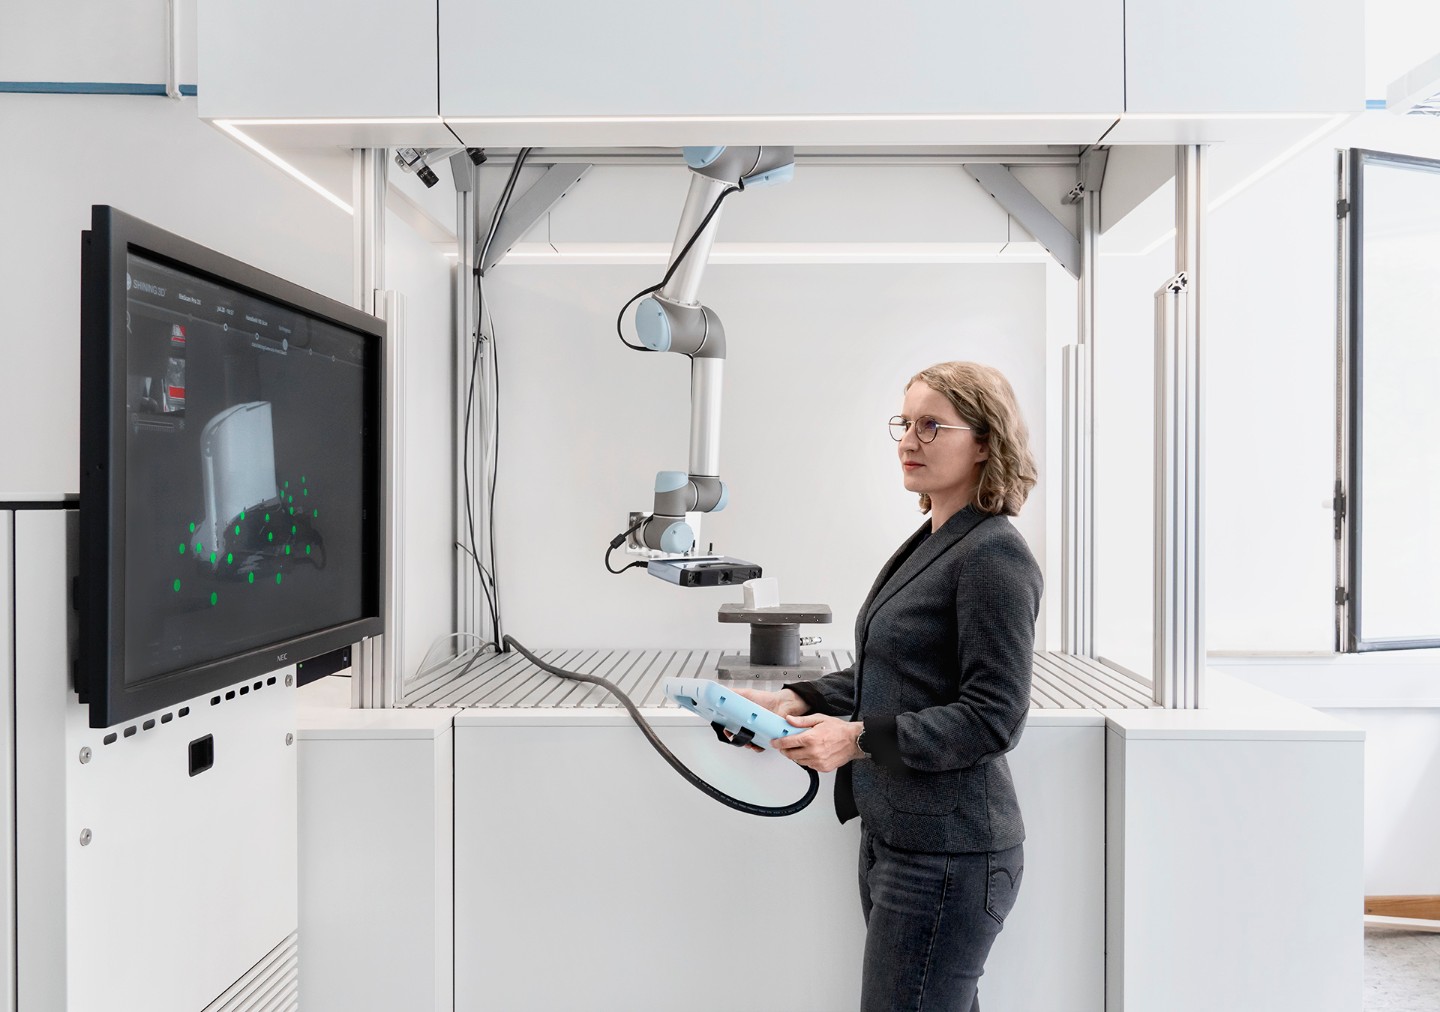
Optical data can now be measured and collected quite easily by laser scanning or photogrammetry. However, this produces very large volumes of data that are often only used for visualization purposes. In order to enable efficient and adaptive repair processes, these scan data must be processed, aligned and converted into parameterized 3D models. This manual reverse engineering requires trained specialists and a great deal of time.
Fraunhofer IPK now offers an automated reverse engineering solution.
Initially, point clouds are generated by using complex geometry and AI-based algorithms. The results are parameterized CAD models. Based on these models, individual automated additive repair processes can be designed. This means that complex and expensive components can be repaired more efficiently and precisely.
Five automated steps – from capture to additively renewed object.
Step 1: Processing and analyzing of scanned data
In order to carry out this complex process fully automatically, researchers at Fraunhofer IPK have developed what is called "Scangineering". With this method, the parameterized 3D models are generated by geometry-based algorithms. Compared to classical reverse engineering methods, Scangineering is based on a high degree of automation. Humans can still be involved as input providers and analysts at any point in the process. However, the user is relieved of the manual, repetitive steps. Scangineering helps to make objects - including individual components, but also entire machines or even buildings - easily and quickly usable as virtual models.
Step 2: Capture defective areas/geometries
In order to obtain useful CAD models from the point clouds, certain requirements must be met. The models must provide access to geometric and structural information in parameterized form and need to be processable easily with other programs. Up to several million data points are pre-processed before the model reconstruction can be started. Therefore, incorrectly detected points are removed, the entire point cloud is divided into subsections and the point density is adjusted.
Step 3: Model feedback and generation of the difference volume
At this point, the actual model feedback begins with the segmentation. The geometric properties of the point cloud are determined and combined into clusters. These clusters are then classified into so-called features - design elements of CAD authoring systems. Finally, they are assembled into a parameterized 3D model according to a construction plan. In order to determine differences between the planned and current state, the data sets are registered in relation to each other and missing volumes are derived. These can then be described separately as regular or Non-Uniform Rational B-Spline (NURBS) and used for CAM planning.
Step 4: Automated CAM planning for the DED repair process
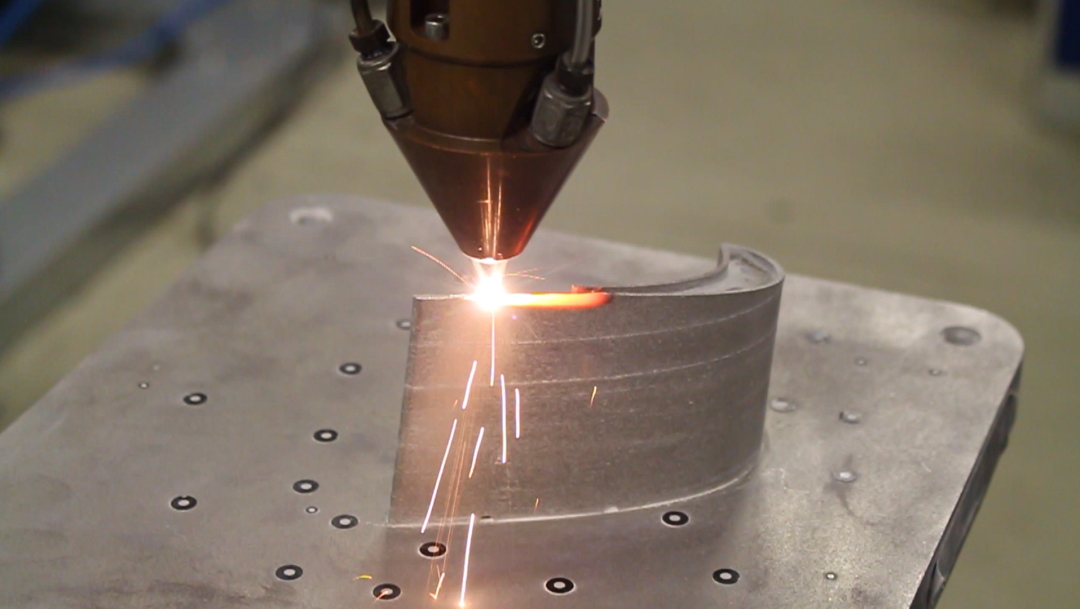
DED-based repair requires tool paths, especially for complex components, which cannot be efficiently generated by manual programming. The parametric model of the real component created in the Scangineering process permits the repair welding process to be implemented easily and quickly in any CAM system. Parametric volumes, surfaces and curves can be used to calculate the filling and coating operations. It is thereby possible to selectively calculate wear protection or functional coatings for individual surfaces and to use larger or more complex volumes of the damaged area by filling the differential volume for the additive buildup.
Step 5: Additive repair process
The final step is the design of the process parameters and the actual part repair. Here materials engineering know-how is required to ensure a metallurgically high-quality and durable repair. Material-specific properties, such as the increased cracking tendency of stamping and forming tools made of hardened tool steels, are taken into account here. The repair welding can now be performed on the basis of the optimum parameters and efficient toolpaths from CAM planning. The result is a geometrically accurate repair with little dilution with the base material and low distortion of the object. In order to meet the individual requirements of the respective use cases, only some software parameters have to be adapted.
Your advantages:
- Continuous digital process chain
- From 3D scan to CAM planning to repaired component
- High flexibility through component-specific geometry and process adaptations
- High material flexibility with low component distortion and minimal influence on the base material
- Time- and cost-efficient repair with a high degree of automation
- Improvement of object properties through better materials and processes

 Fraunhofer Institute for Production Systems and Design Technology

